Crochet Mini Elephant
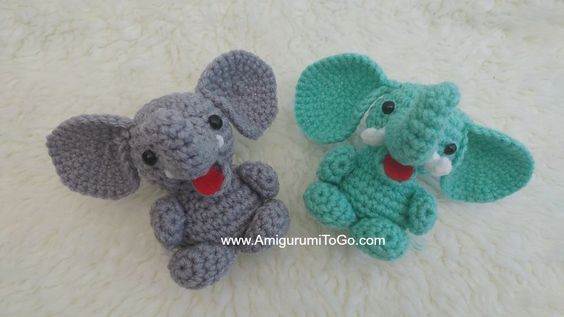
Crochet Mini Elephants are the perfect little companions to add a sprinkle of cuteness to your day! These adorable creations are meticulously crafted with soft yarn, making them not only delightful to look at but also wonderful to hold. Their small size makes them ideal for cozying up in the palm of your hand or taking along on adventures. Whether you're a crochet enthusiast looking for a new project or someone seeking a charming gift idea, these Mini Elephants are sure to bring a smile to any face. Get ready to stitch up some joy and spread a little happiness with these lovable crochet critters!

Supplies:
worsted weight yarn in 2 different colors
4mm to 4.25mm hook
blunt end yarn needle for sewing
scissors
polyester stuffing
8mm to 10mm safety eyes. The grey elephant has 9mm and the other has 8mm.
Abbreviations:
st = stitch
sc = single crochet
ch1 = chain one
sl st = slip stitch
2tog = crochet 2 stitches together
f/o = finish off
How to read the rows:
Mark off the last st of row 2. Move the marker at the end of each row.Each row has a sequence. Example: 1sc then 2sc in next st means repeat that sequence 1sc then 2sc in next st followed by 1sc then 2sc in next st over and over to the end of that particular row. The number inside the parentheses ( ~ ) is the number of stitches you should have at the end of that particular row.
Special notes for the Elephant pattern:
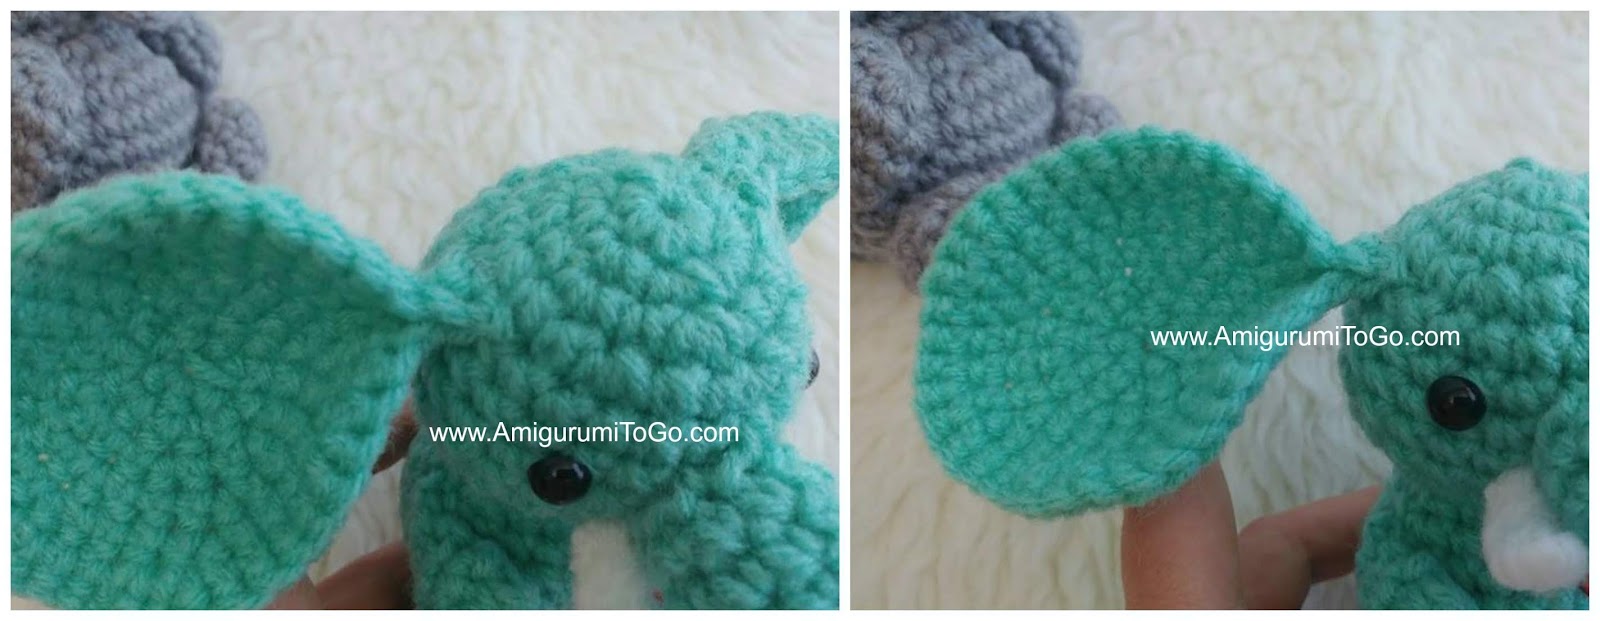
Make the trunk the mouth, and the tusks first, you will sew these on after you finish row 10 and 11 of the head. I found it easier to sew the ears on after the head was stuffed and closed but you can sew them on before. There's no right or wrong way, it's personal preference.
INV DEC: If you see gaps in your stitches as you decrease the rows then use the inv dec. I explain how to do the inv dec in the bear pattern.
Trunk: with body color
1) magic circle or adjustable loop with 6st (6)
2-5) 1sc in each st for 4 rows
6) 1sc in the next 2st then 2sc in the next st (8)
7) 1sc in each st for 1 row
8) 1sc in the next 3st then 2sc in the next st (10)
9) 1sc in each st for 1 row
10) 1sc in next 4st then 2sc in the next st (12)
11) 1sc in each st for 1 row
12) 1sc in the next 5st then 2sc in the next st (14)
sl st next st and f/o leaving a long tail for sewing
Set the trunk aside until you're ready to sew it on. Stuffing instructions are in the head and body section of pattern.
Mouth: using body color
1) magic circle or adjustable loop with 6st (6)
2) work the starting yarn tail into this row, 1sc in next 2st then 2sc in next st (8)
sl st next st and f/o leaving a tail for sewing.
Optional: Tusks with white yarn. Make 2
These are small so will be fiddly to work with. There's no need to make the tusks if you don't want to, the elephant looks cute without them. You could wrap white yarn a couple of times on the face, like I did for the grey one, instead of making the tusks. Or leave off entirely.
1) ch5, the starting yarn tail should be long enough to use for sewing.
2) skip the first ch, 1sc in the next 2ch, 1hdc in the next 2ch
f/o leaving a tail for sewing
Fold the edges of the tusk together, use the starting yarn tail to sew the tusk closed, use the finishing yarn tail to sew tusk to the head.
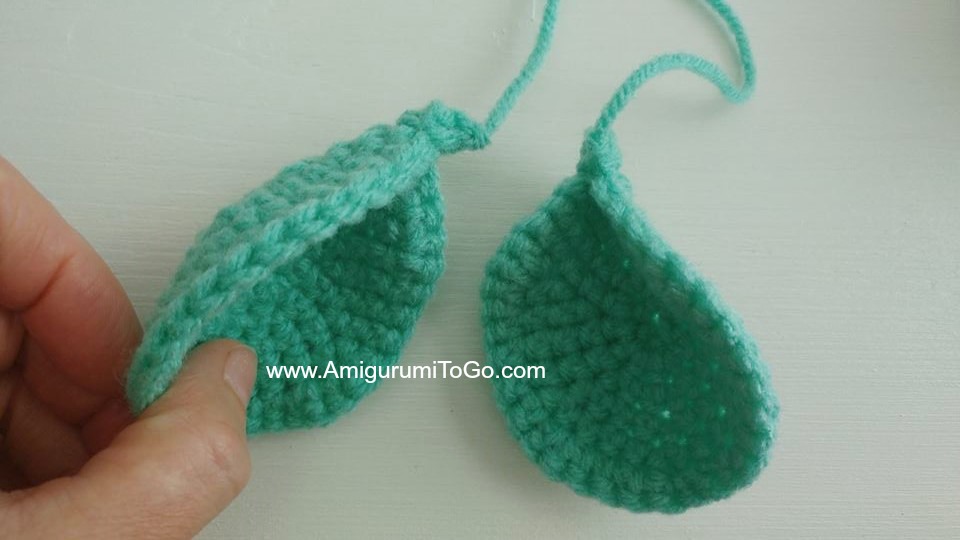
Ears: with body color
1) magic circle or adjustable loop with 6st (6)
2) work starting yarn tail into this row, 2sc in each st (12)
3) 1sc then 2sc in next st (18)
4) 1sc in next 2st then 2sc in next st (24)
5) 1sc in next 3st then 2sc in the next st (30)
the grey elephant has smaller ears than the other one. If you want the smaller ones, stop at the end of row 5. Fold ear in half, wrong side together, and sc through both sides once to hold the fold. f/o leaving a tail for sewing.
6) 1sc in the next 4st then 2sc in the next st (36)
f/o the same way as explained after row 5.

Head and Body:
Starting at the top of the head working down to bottom of body:
1) magic circle with 6sc (6)
2) 2sc in each st (12)
3) 1sc then 2sc in next st (18)
4) 1sc in next 2st then 2sc in next st (24)
5-9) 1sc in each st for 5 rows
10) 1sc in next 2st then 2tog (18)
Let's sew the trunk on now. Stuff the last 6 rows only, there's no need to stuff the tip (first 6 rows) of the trunk as it will lose its shape and the ability to curve upwards. Place the top of the trunk just below row 5, the bottom edge should be on or about row 9. Start sewing around, leave a small gap to push in more stuffing if needed. Be sure not to over-stuff this part, it will just cause it to look bulky. Once stuffed, sew up gap, knot off inside the head. Cut the yarn tail shorter and leave it inside the head.
Install the eyes on either side of the trunk in between the 6th and 7th row.
Sew the mouth on just below the trunk, wrong side facing the trunk. Glue in a piece of red felt for a tongue, glue it in after the mouth has been sewn in place.
If you chose to make the tusks, sew those in now on either side of the trunk on or about row 7

11) 1sc then 2tog (12)
12) 1sc in each st for 1 row
13) 1sc then 2sc in next st (18)
14) 1sc in next 2st then 2sc in next st (24)
stuff and shape head. Add more stuffing into the head over the next few rows as needed
15) 1sc in each st for 1 row
16) 1sc in next 3st then 2sc in next st (30)
17-18) 1sc in each st for 2 rows
19) 1sc in next 3st then 2tog (24)
20) 1sc in next 2st then 2tog (18)
21) 1sc then 2tog (12)
stuff the majority of the body
22) 1sc in next 2st then 2tog (9)
f/o leaving a tail for sewing. Weave in and out of the remaining stitches then stuff the body. Make sure to shape the body as you stuff. Once done, pull yarn tail tight to close up the body, knot off and hide yarn tail inside body.
Arms: with body color
1) magic circle with 6sc (6)
2) 2sc in each st (12)
3) 1sc in next 2st then 2tog (9)
4) 1sc in each st for 1 row
stuff to the top edge of arm
5) 1sc through both sides to close up the arm
f/o leaving a tail for sewing
Legs: with body color
1) magic circle with 6sc (6)
2) 2sc in each st (12)
3) 1sc in 3st then 2sc in next st (15)
4) 1sc in each st for 1 row
5) 1sc in next 3st then 2tog (12)
6) 1sc in next 2st then 2tog (9)
7) 1sc in each st for 1 row
stuff the first 4 rows of the foot
8) 1sc through both sides across to close up the leg
f/o leaving a tail for sewing
Assembly of legs, tail, arm and ears:
1) Legs: It's important to sew the legs on first. Make sure the stuffing is still in the first four rows, squish it around with your fingers and arrange the stuffing best you can. If you sew the legs too far back then the giraffe will not sit up on its own. Play around with position until you are certain it will sit. Whip stitch the edge to the body then tack down both sides so the legs stay in position. About 3 minutes into the assembly video I give you a tip on how to get it to sit up if it falls over.
Tail: If the yarn tails are still pretty long after you sew in the legs, you can use them to make the tail. Just pull the yarn tails through a stitch hole where you want the tail to go. Using both yarn tails, crochet a chain of 5 then trim to desired length and fray the ends.
If the yarn tails are not long enough, pull a strand of yarn through to make the tail.

Sew the arms on
3) Sew the ears on. Play around with the position of them, sew them where they look good to you. The grey elephant's ears were sewn higher than the other one. I think it's really a matter of personal preference. I sewed this ones ears in between the 4th and 5th row.
