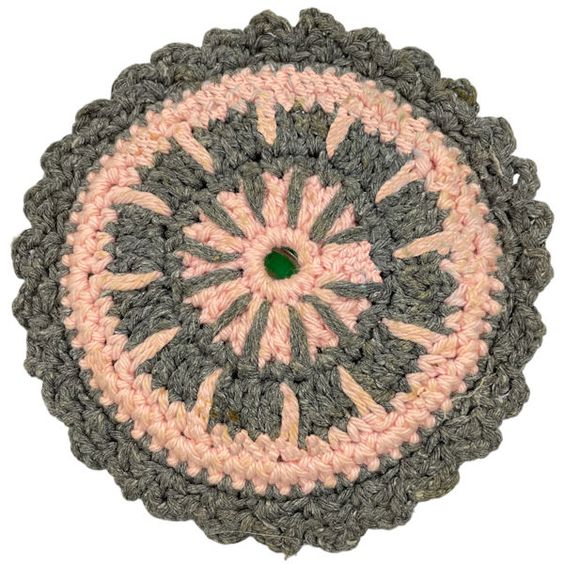
Crochet Spiked Hot Pad
If you're looking to add a stylish touch to your kitchen, consider making a crochet spiked hot pad! This fun and functional project not only protects your surfaces from hot dishes but also adds a pop of personality to your home decor. By incorporating spikes into your design, you can create a unique and eye-catching hot pad that will impress your guests. With various yarn colors and stitch patterns to choose from, the creative possibilities are endless. So grab your crochet hook and let your imagination run wild as you craft a one-of-a-kind spiked hot pad that perfectly complements your kitchen aesthetic. Happy crocheting!
Materials Needed
Worsted weight cotton yarn in 2 contrasting colors. I used Aunt Lydia's Denim in grey and Peaches & Creme in pink.
1 old CD
Size H/8 or 5mm aluminum crochet hook
Yarn Needle
Yarn Thickness: 3mm
Gauge: 4sc =1"
Finished Size: 7" diameter
Skill Level Beginner to intermediate
Spike Single Crochet. (Ssc): According to the Harmony Guide to crocheting page 30. This stitch can be worked over 1 or more rows (usually sc rows) but for this pattern, it is worked over a dc row in the following way. Insert hook in next st 1 row straight down, yo, draw lp through and up to height of current row, yo draw through both lps on hook.
Instructions
Front:
RND 1: With Pink. Ch6. Join w/slst to first ch to form ring. Ch1. 12 sc in ring. Join w/slst to first sc.
RND 2: Ch3. Dc in same st as slst. 2dc in each st around. Join w/slst to top of ch3. Fasten off pink.
RND 3: Join grey in any st. Ch1. Sc in same st as joining. Ssc. *2sc in next st. Ssc. Rep from * around. Join w/slst to ch1. NOTE: You will be putting 1 Ssc in top of each of the 12 stitches of the first round.
RND 4: Ch3. Dc in same st as slst. Dc in each of the next 2 sts. *2dc in next st. Dc in each of the next 2 stitches. Rep from * around. Join w/slst to top of ch3. Fasten off grey.
RND 5: Join pink in any stitch. Ch1. Sc in each of the next 2 stitches. Ssc. *Sc in each of the next 3 sts. Ssc. Rep from * around. Join w/slst to ch1. (you should have 48 sts around.)
RND 6: Ch1. Sc in same st as slst. Sc in each of the next 3 sts. *2sc in next st. Sc in each of the next 3 sts. Rep from * around. Join w/slst to ch1. (You should now have 60 sts around.) Fasten off pink. Set Front piece aside.
Back:
RND 1: Front: With Pink. Ch6. Join w/slst to first ch to form ring. Ch1. 12 sc in ring. Join w/slst to first sc.
RND 2: Ch3. Dc in same st as slst. 2dc in each st around. Join w/slst to top of ch3.
RND 3: Ch1. Sc in same st as slst. *Sc in next st. 2sc in next st. Rep from * around. Join w/slst to ch1.
RND 4: Ch3. Dc in same st as slst. *Dc in each of the next 2 sts. Dc in next st. Rep from * around. Join w/slst to top of ch3.
RND 5: Ch1. Sc in same st as slst. *Sc in each of the next 3 sts. 2Sc in next st. Rep from * around. Join w/slst to ch1. You should have 60 sts around.
RND 6: Ch1. Sc in each st around. Join w/slst to ch1.
Assembly
RND 1: Put front and back pieces together wrong sides facing each other. With grey. Work 1 sc in each st around joining the two pieces together. Before closing, insert CD then finish to close.
RND 2: Edging. Ch3. Dc in same st aslst. Sk next st. Sc in next st. Ch2. *Dc in same st as last st. Sk next st. Sc in next st. Ch2. Rep from * around. Join w/slst to base of ch3. Fasten off and weave all ends into back of work.