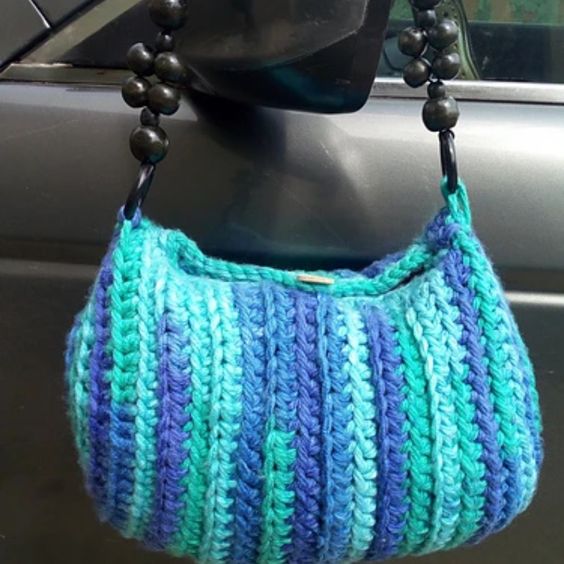
Crochet Chunky Bag
Create your very own oversized handbag using the art of crocheting with thick yarn. This stylish accessory is perfect for carrying all your essentials while adding a touch of handmade charm to your outfit. The chunky texture of the bag gives it a cozy and trendy look, making it a must-have for any fashion-forward individual. Whether you're heading to the beach or running errands in the city, this crochet chunky bag will be your go-to accessory for any occasion. With its sturdy construction and spacious design, the crochet chunky bag is not only fashionable but also practical. You can customize the size, color, and style of the bag to suit your personal taste and preferences. The chunky yarn used in this project adds a unique texture and dimension to the bag, making it stand out from store-bought options. Show off your creativity and crochet skills by making a statement piece that is sure to turn heads wherever you go.

Another thing that makes this chunky crochet bag pattern unique is that the pattern works up so fast as it uses a super chunky yarn and a size 8.00 mm hook
Materials for this easy chunky crochet bag pattern
Yarn – Any bulky weight yarn is ideal for this chunky crochet bag pattern. The prototype was made using Cygnet Seriously Chunky (52 yards/ 48 meters per 100 g/3.5 oz)
(3) in Toucan
Gauge – 8 hdc over 4 rows makes 3” by 3”
Hook – Size 8.00 mm hook for the body, size 6.5 mm for the handle.
Other materials needed for this chunky crochet bag pattern
- Stitch markers
- Yarn needle
- Scissors
- Bag handle
- Metal hooks/claps (or key rings)
Stitch Abbreviations
- Chains – ch(s)
- Single crochet – sc
- Half double crochet – Hdc
- Back loop only – BLO
- Front loop only – FLO
- Slip stitch – sl st
- Fasten off – FO
Finished dimensions of this chunky crochet bag: 12” (width) by 9” (height)
Height excludes the handle
Difficulty – Easy
Chunky crochet bag pattern notes
- Chains at the beginning of the row count as a stitch
- Both sides are worked in BLO, while the body of the bag is made using FLO and BLO.
- Pattern construction – starts with a side in rounds, the body is then worked by turning after each row, and finally, the other side is made.
- Do not join after the rounds/rows, except where stated. Simply move the stitch marker at the end of each round
- The handle can be made as instructed using yarn or sewing in a pre-made handle
Crochet chunky bag pattern
First side –
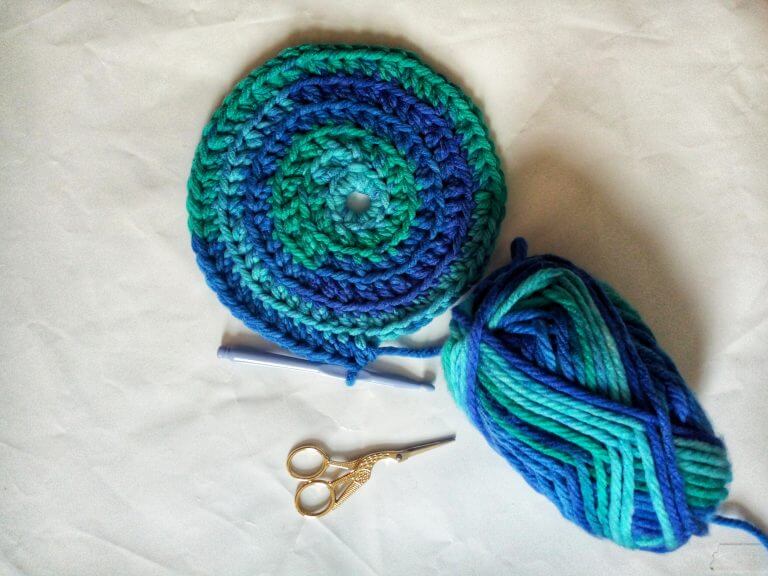
Row 1: Ch 4, join to form a ring (there would be a little opening) 10 hdc into the ring (10 hdc)
Row 2: Working in BLO, 2 hdc in each st across (20 hdc)
Row 3: *2 hdc, hdc in next st, repeat from * to the end of the round (30 hdc)
Row 4: *2 hdc, hdc in next 2 sts, repeat from * to the end of the round (40 hdc)
Row 5: *2 hdc, hdc in next 3 sts, repeat from * to the end of the round (50 hdc)

Chunky Crochet Bag Pattern
Row 6: Hdc in each st across (50 hdc)
Row 7: Working in FLO, Ch 1, hdc in each st, turn
Row 8: Ch 1, working in BLO, hdc in each st, turn (50 hdc)
Body
Row 9 – 21 Repeat row 7 and 8 alternating
Second side
Working in a spiral without joining or turning, simply move the stitch marker with every row –
Round 22: Working in BLO, ch 2, hdc in each st (50 hdc)
Round 23: *Hdc in next 3 sts, hdc2tog, repeat from * to the end of the round (40 hdc)
Round 24: Hdc in each st across (40 hdc)
Round 25: *Hdc in next 2 sts, hdc2tog, repeat from * to the end of the round (30 hdc)
Round 26: Hdc in each st across (30 hdc)
Round 27: *Hdc, hdc2tog, repeat from * to the end of the round (20 hdc)
Round 28: Hdc2tog across (10 Hdc)
Fasten Off
Working on the bag opening
Join yarn with a sl st to the edge (corner), ch 1, sc in each edge across, join with a sl st to the first chain, do not Fasten off
Buttonhole
Ch 1, working through the BLO, sl st in next 12 sts, chain 5, skip next 2 sts, sl st in each of the remaining sts
Fasten off, sew in the edges
Sew in the button to the other side
Handle
Option 1 (if using yarn handle)
Using 6.5mm – chain 130, slip in 2 metal rings, join with a sl st to the first chain to form a ring.
Secure the metal rings by sewing them individually to the edge/corner of the bag
Option 2 (using a pre-made bag handle)
Sew in a ready-made handle to the sides of the bag.